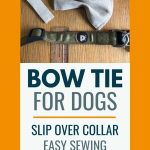
How To Sew A Bow Tie For Dogs With This Easy Sewing Pattern: Make A Bow Tie For Your Dog’s Collar
There are some really cute DIY pet accessories that even DIY novices can make. This is a beginner-friendly, dog bow tie tutorial that is easily adapted to whatever thickness your dog’s collar is. It’s designed to slip over the dog collar, so you can remove it to wash it or change it for a different bow tie whenever you like.
You can use this bow tie pattern for dogs to make a fantastic accessory for your pooch, using hardly any fabric too, so it’s great for all those little scraps left over from other sewing projects.

BEST FABRICS TO USE FOR DOG BOW TIE
If you plan to use a patterned fabric, think about the pattern – will it be lost on something small like a bow tie? If it is a large print, you won’t be able to see what it is. To avoid this, choose a plain fabric or a small print pattern. Geometric or abstract patterns work very well for bow ties.
A thicker fabric will keep its shape nicely and you won’t need to add any interface to stiffen it – upholstery fabric is great for this.
DIY DOG BOW TIE TUTORIAL
Materials
- 10.5×10.5″ (27x27cm) piece of cotton fabric
- Pins
- Scissors or rotary blade
- Ruler / tape measure
- Sewing machine
1. Cut the fabric. Cut a 10.5″ x 7” (27x18cm) rectangle and a smaller 5″ x 3” (13x8cm) rectangle.
2. Sew the fabric. Fold the larger rectangle in half down the longer length, right sides together, and sew along 2 sides, leaving one of the short ends open.
Watch out! If your chosen fabric is very thin, you will probably need to add interface to the larger rectangle
3. Turn right side out. Clip the corners and trim the seam allowance down to ⅛” (3mm) to avoid bulk. Turn the fabric right side out. Press it flat.
Lazy seamstress note: I am extremely lazy when it comes to sewing. I never pin something if I can get away with just holding it. You of course may wish to pin seams together before you sew, and you would be wise to! However, there are certain steps, such as pressing, that even a lazy seamstress like myself should not avoid.
4. Create the bow. Tuck in the raw ends of the rectangle and press. Fold the strip in half across the short middle and stitch the opening closed. To make the other end (the fold) look the same, I sewed this too. Gather the fabric in the middle to make the bow tie shape.
Optional: Your bow tie will stay in better shape if you sew a stay-stitch by hand through the middle.
5. Measure the bow tie loop. Measure your dog’s collar to see how big the loop needs to be in order to slip it on to the collar – be sure to measure the widest part of the collar, usually the buckle.
6. Make the bow tie loop. Fold over .5cm along both long sides of the smaller rectangle and press. Fold in half down the middle length to bring these 2 folds together. Press. Sew along the length. Fold it in half across the short side and sew across the open ends, creating a loop just a little bigger than your collar’s measurement. Flip it over so the seam is on the inside of the loop.
Helpful tip: Depending on the size of your dog’s collar, your might want to change the size of the smaller rectangle to fit accordingly. For instance, for a tiny collar, you may wish to reduce both the width and the length of the smaller rectangle.
7. Put the bow tie together. Pop the bow through the loop. You could leave it like this, though there is a risk that the bow will come out of the loop. To avoid that happening, do a quick hand stitch to attach the loop to the bow.
How to attach bow tie to dog collar: Finally, slide the bow onto your pup’s collar. Job done!
Helpful tip: If your loop turns out to be too small now to pass over the buckle of the collar, try just putting the loop on without the bow in it, then pop the bow in place once the loop passes the buckle.
Grisha Stewart’s Dog Training And Behaviour School
DOG BEHAVIOUR PROBLEMS?
NEED TO UP YOUR DOG TRAINING?
Get access to 100s of hours of video classes, eBooks, special events and live sessions, covering most aspects of dog training and behaviour:
- puppy training
- dog reactivity, aggression, resource guarding
- dog confidence, fearful dogs
- loose leash walking
CONCLUSION
In this simple tutorial on how to make a bow tie for a dog collar, we saw that a cute accessory for your pooch can be quickly put together, from even the smallest scraps of fabric. Your dog will look so dapper in his new doggy bow tie!
If you enjoy making things for your pup, why not take a look at these DIY dog projects?
DIY washable and travel snuffle mats
Matching dog bandana and human face mask
Dog products made with essential oils